Reference Source link: https://stoneridgesoftware.com/tfs-code-repository-and-dynamics-ax/
If you are using TFS as your Dynamics AX code repository, there are a few things you will want to do to make life easier for those around you.
Dynamics AX & TFS Integration
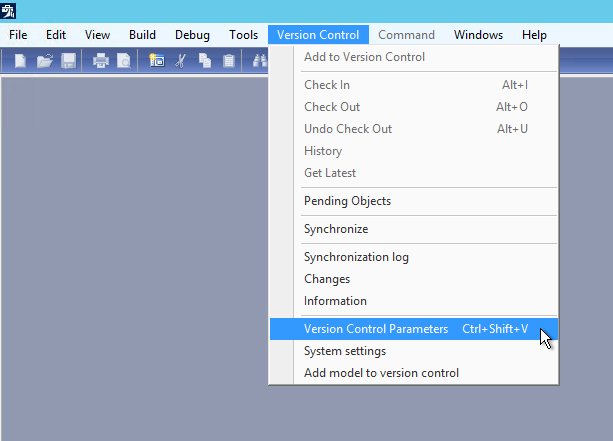
First, here is where you would go to setup your TFS integration in Dynamics AX 2012:
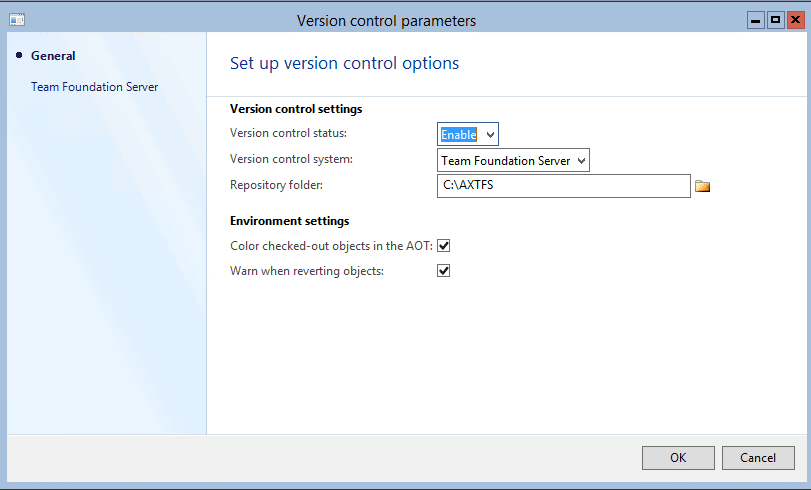
This will open this form:
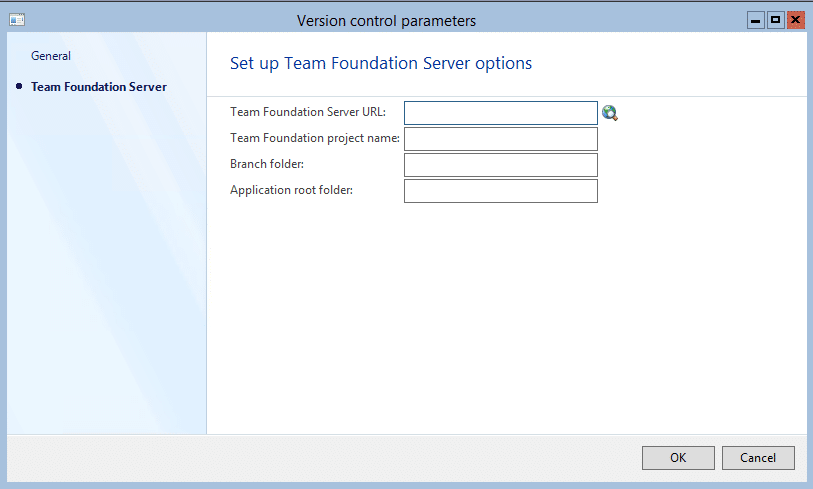
Make sure to open both pages as well:
This page is actually more important than the first. You can see that here is where we will be setting up the connections to Dynamics AX. Work with your TFS admin to get the values for these.
Adding Code & Checking out Code
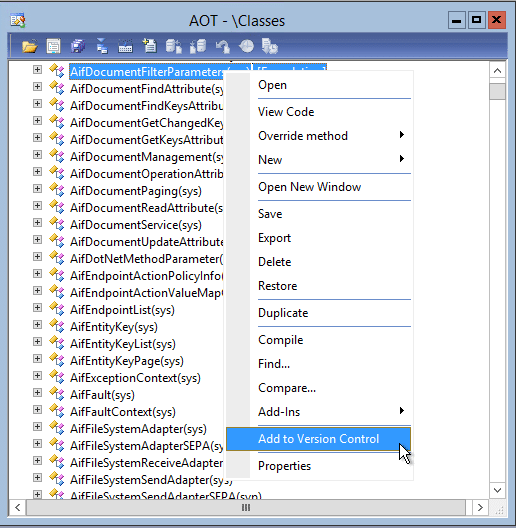
In order to add Dynamics AX code to your TFS repository, you must first make a change to bring the code into your current layer. So make your needed changes, then you can right-click on the object and choose “Add to Version Control.”
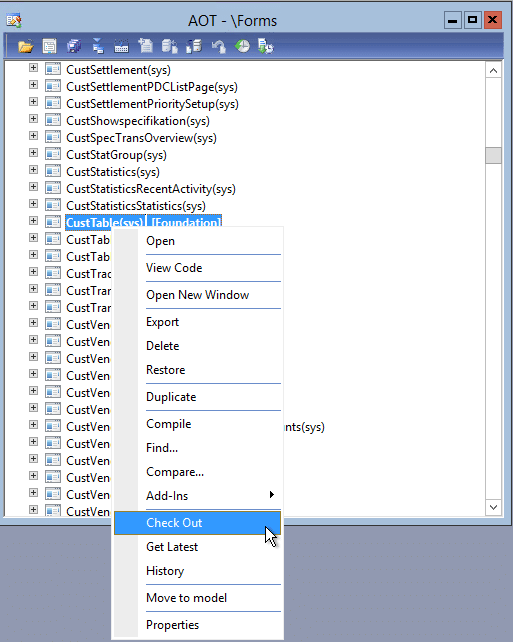
To check out code you can either right-click on the object in the AOT and choose “Check out.”
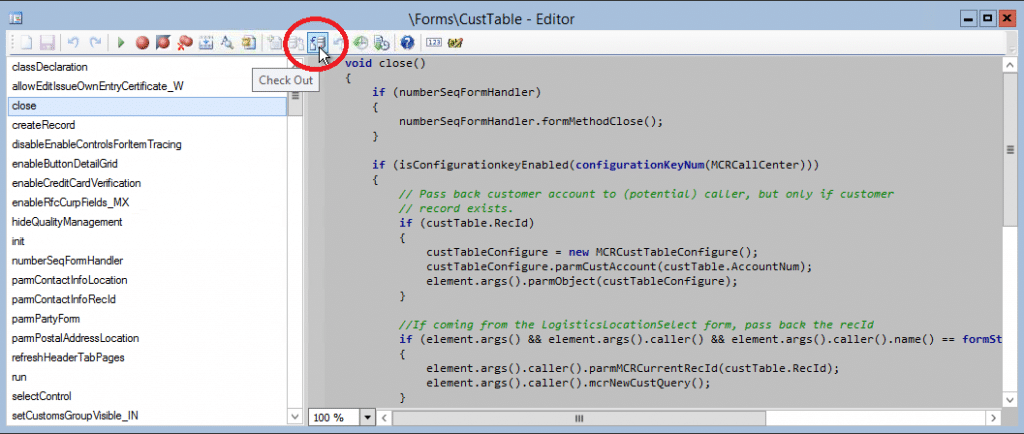
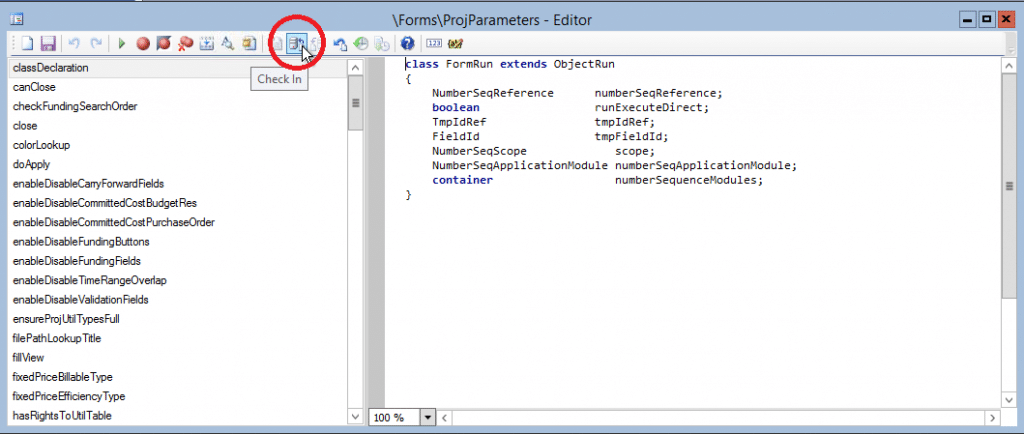
Or, there is a button on the toolbar if you are in the editor.
Labels
A bit separate from this is labels.
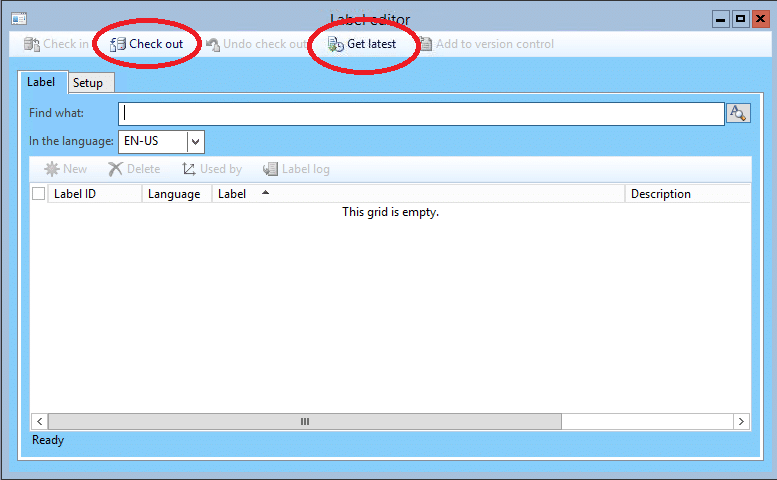
If you go to the label editor you will be presented with a few buttons across the top. When you need to create a new label, I recommend you do “Get latest” first. In theory, the system should do that during checkout, but I feel it is better to be safe and do it yourself.
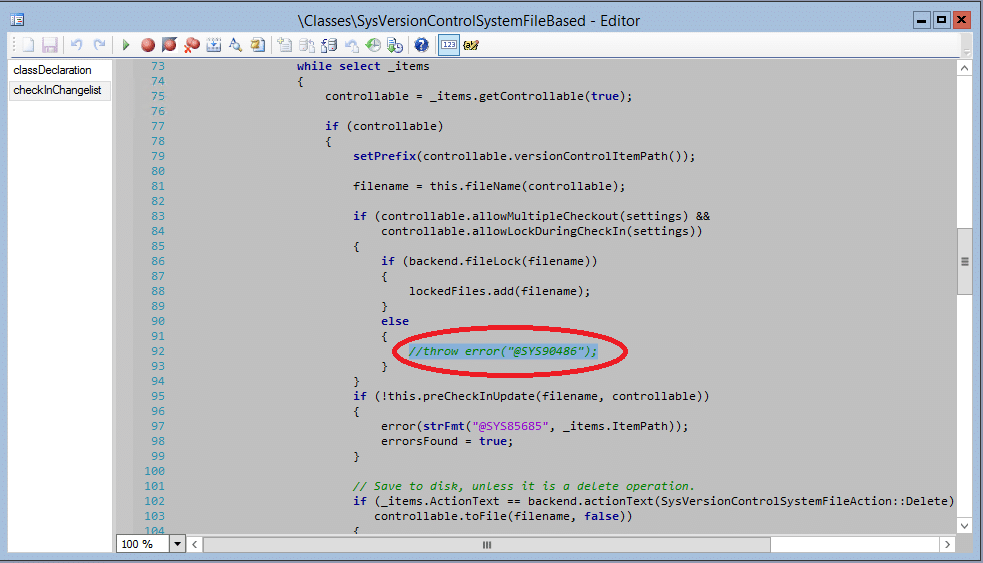
The other thing to mention with labels is that if you have single checkout enabled (only one person can check out an item at a time) you need to comment out the following code.
Checking in Code
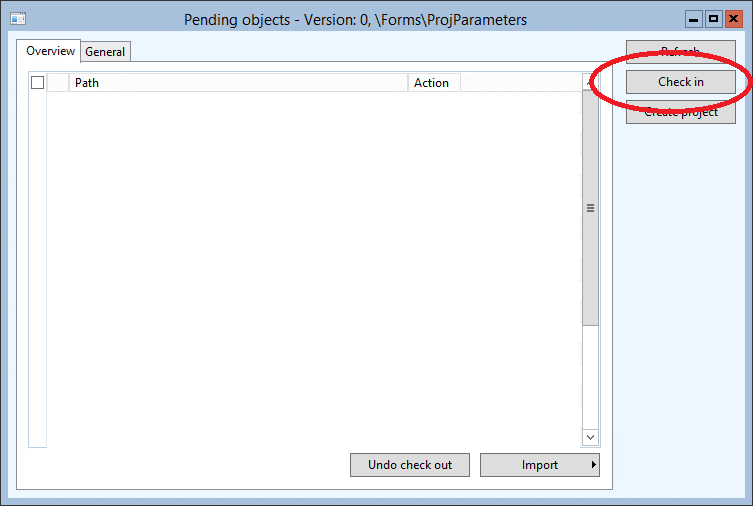
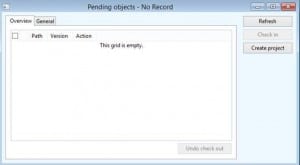
Once you are ready to check in, go to Version Control > Pending Objects. This will show you a list of everything that is ready to be checked in. You will notice that there is a “Check In” button here as well.
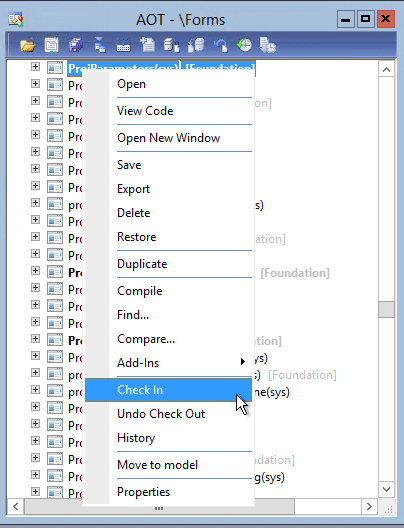
You can also check in by right-clicking an object in your AOT and clicking “Check In”:
Or, with the button on the editor:
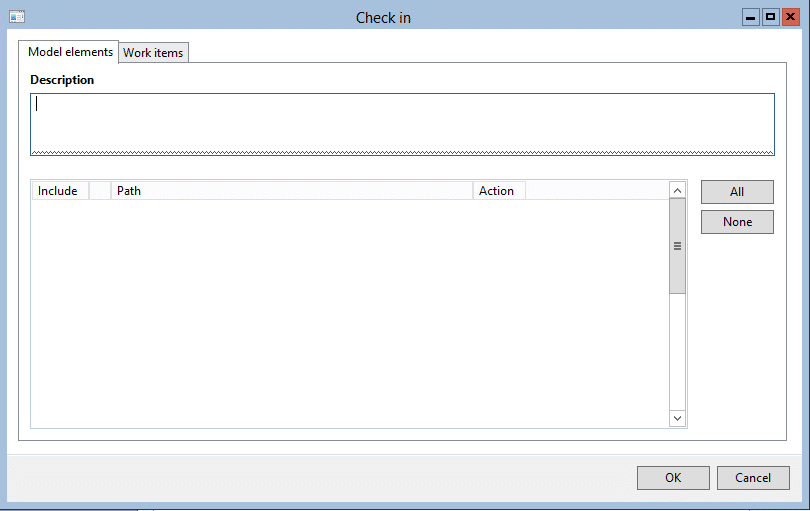
Once you click on the button a new dialog will show up.
Here, you can select what objects you want to check into TFS. You will also see a text box on the top of the tab page. Here is where you would put the description of your check in. I highly recommend a standard format to be used by all of the developers on your team. The format I use is:
<Initials> – FDD <###> (or) Bug <###> – <Description>
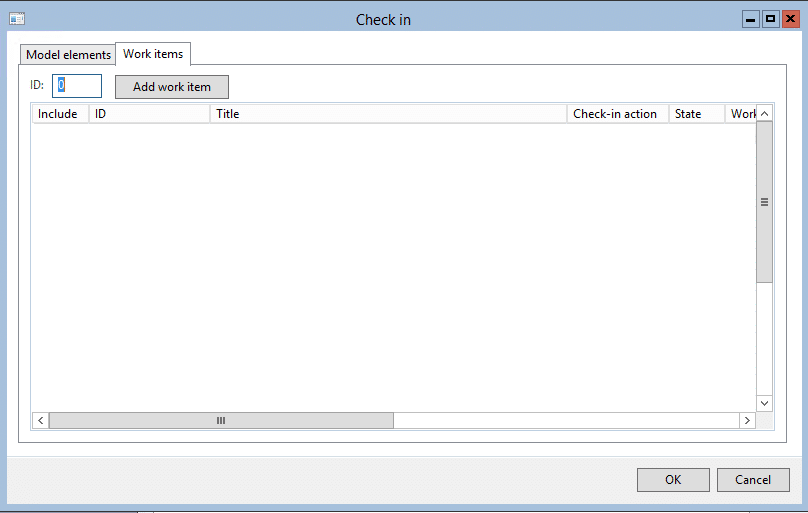
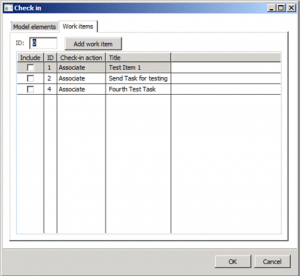
You should notice that there is a second tab page as well. Here you will choose what task to associate this check-in with. In general, it is best to associate a check-in with a TFS task. The list that you see is anything that you are assigned to in TFS. If you need to check in against a task that is not assigned to you, there is an “Add task” section on the top that will allow you to put in a TFS ID so you can check in against it.
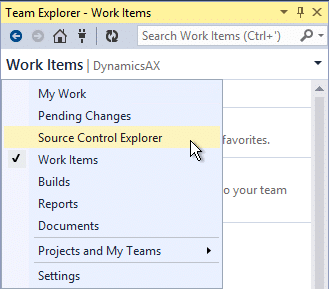
Once your code is checked in, you can now go into Visual Studio and see the object.
From here you can view the history of the object and many other cool features.
Synchronizing Your Code
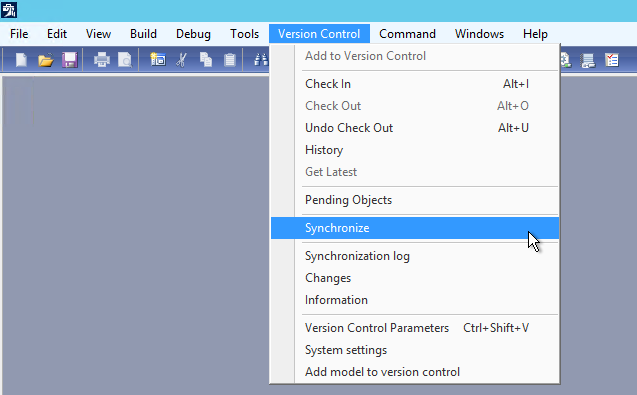
The other thing you want to make sure you do frequently is Synchronize your code in AX with what is in the TFS code repository. To do this simply click on Version Control > Synchronize.
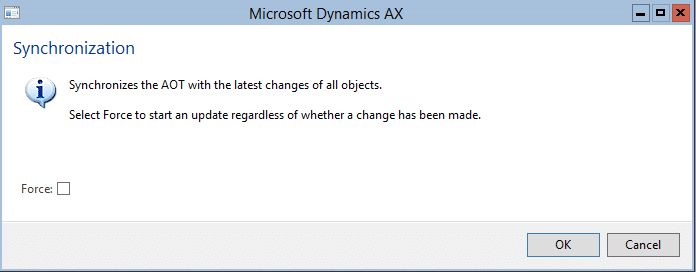
This will present you with a new window.
Simply click the “OK” button and it will pull in the latest version of the code into AX. You will notice that there is also a “Force” check box. Checking that check box tells AX to pull in EVERYTHING from source control. In general, you don’t need to do “Force” very often. The non-Force “incremental” synchronize is usually sufficient. My practice is to run this once a week (usually Monday) or if I know a large feature has been checked in that I want to pull down locally. How often you synchronize is really up to you.
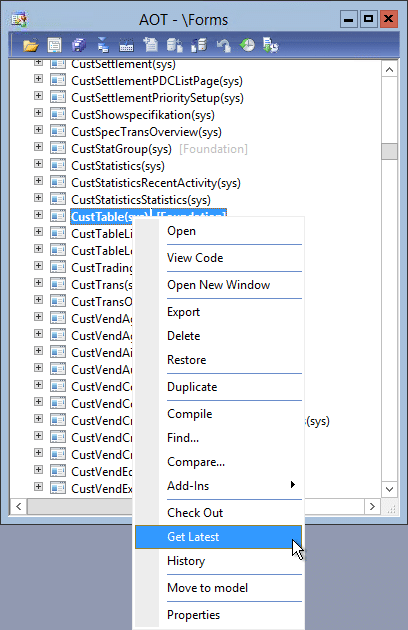
If you do not want to pull everything down, you can sync one item at a time by going to the object in the AOT, right-clicking on it, and selecting “Get Latest.”
Synchronization Log
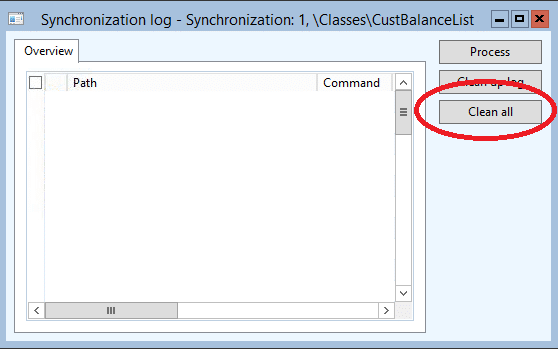
The last thing to bring up is the “Synchronization log.” You can find it right under the Synchronize menu option. Version Control > Synchronization log. For the most part, you don’t need to worry about this form, but you may get an error when trying to sync down an object saying something to the effect of “This object was not imported properly, please check the synchronization log and try again.” The easiest way to fix this is to open the log and click the “Clean all” button. This will clear out the log and allow you to attempt to pull the object down again.
AX and TFS in Daily Activities
Reference Source link: https://stoneridgesoftware.com/ax-and-tfs-in-daily-development-activities/
To check new objects into TFS:
- If the object exists and you have not modified the object, modify it first. If the object is a completely custom object, create it first.
By default objects do not exist in version control. For example, objects that exist only in the sys and syp layers would not be checked into TFS because they can be recreated simply by reinstalling AX. Version control is for tracking changes to customizations made to existing objects or for completely custom objects.
- In the AOT right-click on the object and choose Add to Version Control
- Once you have a collection of objects ready for check-in, in the AOT go to Version control > Pending Objects and check-in the objects in the list
-When objects are added to version control, xpos are created for the objects and saved into the local repository on the developer’s machine.
-When the objects are checked into version control, the xpos in the local repository are copied up to the central shared TFS repository.
- In the form where you check in the objects there is a Work Items tab.
-Enter in the ID of the TFS task to tie this check-in to and in TFS’s Sharepoint site in this history for the task you’ll see your check-in against the task and you will see the individual objects that were checked-in.
To check out objects previously added to version control:
- In the AOT right-click on the object and choose Check Out
- Make your changes to the object
- Click on Version control > Pending Objects and check-in the objects in the list
-Once one developer has an object checked out, another developer will not be allowed to check out that same object
To view the history of an object:
- Right-click on the object and choose History
- In the form that opens you can select a version from the list and click the Get button to import that version of the object into your AOT.
- In the form that opens you can click the View file button to open the xpo for a particular version of the file
To synchronize to changes checked into the central repository by yourself or other developers:
- Click on Version control > Synchronize
- In the dialog that opens mark the Force checkbox and click OK.
-This will force version control to overwrite any changes you’ve made to objects in your local AOT that aren’t checked out or under version
control.
- In the form that opens, mark the model you want to synchronize to.
-When you synchronize to the central repository all of the xpos that have been checked in since the last time a sync was executed on the machine, are copied from the central repository to the local repository.
-Once the xpos exist in the local repository they are imported into AX and a database synch and compile are performed for those imported objects.
To check out the label file and add new labels to it:
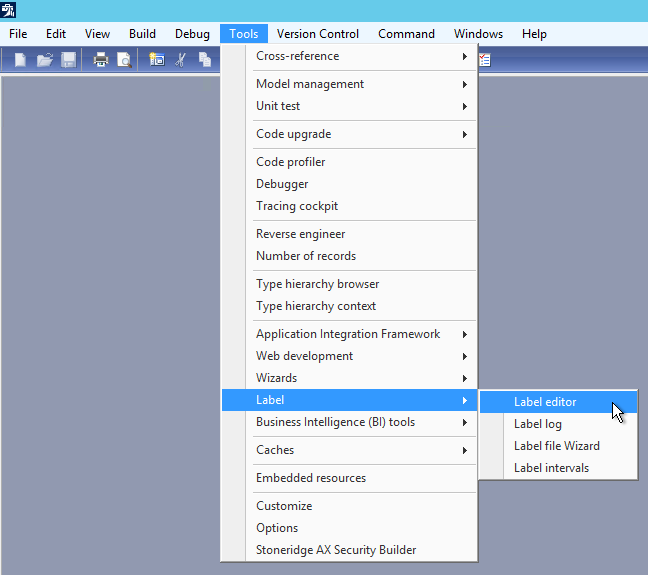
- Click on Tools > Labels > Label editor
- The label editor form will open and at the top click on the Get Latest button to ensure you have the latest copy of the label file.
- At the top of the label editor form click the check-out button to check out the label file.
- To create a new label, in the label editor form, click the New button and save the label.
- The label will be given a temporary label id like $@ABC123. Use the temporary label id in your code that uses the label.
- Once the labels have been created, click Version control > Pending objects and check-in the objects in the list. (The label file will be one of the objects.)
- When you check in the label file, a permanent label id will be assigned to each new label.
-If the code you have that uses those labels is still checked out or is being checked in with the label file, the temporary labels will be automatically replaced with the permanent label id.
-If the code you have that uses those labels is not checked out, after the label file is checked in and the permanent label ids are known, you’ll have to go through your code, check out the objects, and manually change the code to use the permanent label id.

No comments:
Post a Comment